Installation
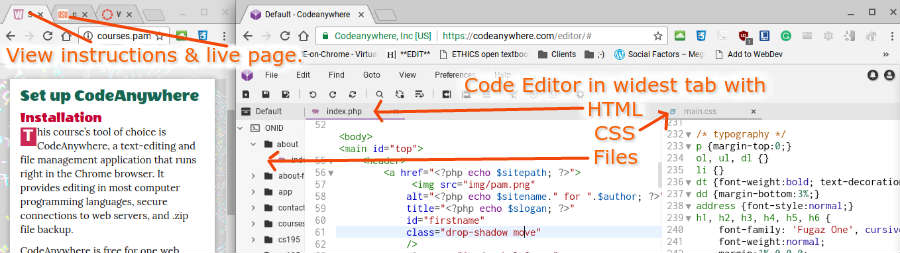
The Anywhere web application is a text-editing and file management application that runs right in the Chrome browser. It provides editing in most computer programming languages, secure connections to web servers, and .zip file backup.
CodeAnywhere is free for one or more web accounts and can be used with the free 000WebHost.com account. If you want to set up more hosting servers, then you may purchase the premium application. CodeAnywhere will allow you to work on files remotely on your server then back them up to your hard drive using Secure File Transfer Protocol (SFTP). However, 000WebHost.com does not provide Secure FTP; just FTP.
In a previous lesson, you were instructed to launch CodeAnywhere from the Chrome browser, or some other HTML editor.

- Click the G+ (Google) button to login with your Google Account.

If you already own Dreamweaver or Notepad++ on the computer you’ll use for class, then don’t use ShiftEdit or CodeTasty; you won’t need it.
Connect
With Chrome and CodeAnywhere open, set up a connection to yourpublic_html web server folder:
- On the left sidebar menus, right-click on the default menu.
- Choose New Connection
- Choose FTP from the menu.
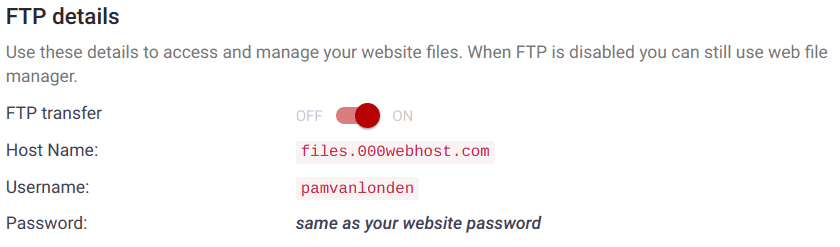
- On the Connection screen, type the correct values provided by the host company:

- Name: 000WebHostApp
- Authentication type: Password.
- Host: files.000webhost.com
- Username: Your 000webhost.com user name.
- Password: Your 000webhost.com password.
- Initial directory: public_html
- Click the Save button.
- Change the theme.
From the Preferences → User → General menu, select a new Theme and color scheme if you don’t like white text on a dark background. If you like black on white, then choose the white theme and color scheme. - Backup. CodeAnywhere lets us create folders and files directly on our web server and transfer (copy/backup) to our local hard drives for safe keeping. Right-click → Download to a .zip archive. If you are using Dreamweaver, then you’ll create files on the local hard drive first then transfer/copy them to the server. Always maintain two copies…one on the server and at least one on the hard drive.
- Set up Screens so that you have room to edit and view your live page without flipping to another screen.